Continuous integration and continuous delivery (CI/CD) plays a crucial role in DevOps workflows by automating the process of integrating code, running tests, and deploying applications.
At AgileTest, we understand how critical automation is to your development pipeline. That is why we have introduced a powerful new feature: the ability to import automated test results directly into AgileTest via a pipeline trigger using GitHub Actions.
In this blog post, we will guide you through the complete setup process, so you can simplify your testing and gain full visibility inside Jira.
Why Use GitHub for Test Automation?
Before diving into the integration, let us first understand the role GitHub plays in this setup.
GitHub is a widely used platform for version control and collaboration. Its Actions feature allows you to define custom workflows in YAML files to automate tasks such as testing, building, and deploying software. It is built into your repository and supports triggers based on events like commits, pull requests, and scheduled intervals.
By integrating AgileTest with GitHub, you gain the ability to:
- Run automated tests every time code is pushed.
- Upload test results directly into AgileTest’s test executions.
- Reduce manual steps and human error.
- Track test coverage and quality in your Jira issues automatically.
Integrating AgileTest with GitHub
To integrate AgileTest with GitHub Actions, you will need to set up a few essential components, including API credentials, a GitHub personal access token, and a GitHub Actions pipeline. This setup will automate the process of running tests and uploading results directly into AgileTest, simplifying your testing workflow.
Here’s a high-level look at what we’ll set up:
- Generate API credentials in AgileTest (Client ID and Secret)
- Create a GitHub personal access token for secure workflows
- Define a GitHub Actions YAML pipeline to automate authentication and upload results
- Configure GitHub integration inside AgileTest
- Trigger the test pipeline and view results in AgileTest
Let’s break each of these steps down in detail. Watch this tutorial here: Integrate Github Actions with AgileTest.
Step 1: Setting Up API Credentials and Tokens in AgileTest
The first step is to enable secure communication between your CI pipeline and AgileTest through API authentication.

How to do it:
- Log into Jira with admin rights.
- Navigate to: Admin Settings → AgileTest → API Integration.
- Click “Generate New Token.”
- Select a Jira user to link with the token.
Copy and personally store your Client ID and Client Secret — these will be required to authenticate requests to AgileTest.
🛡️ Note: Keep these credentials safe and never commit them to your repository.
Step 2: Generate a GitHub Personal Access Token
Your GitHub Actions workflow needs permission to interact with GitHub’s features securely. To achieve this, generate a personal access token (PAT) with the appropriate scopes.
Steps:
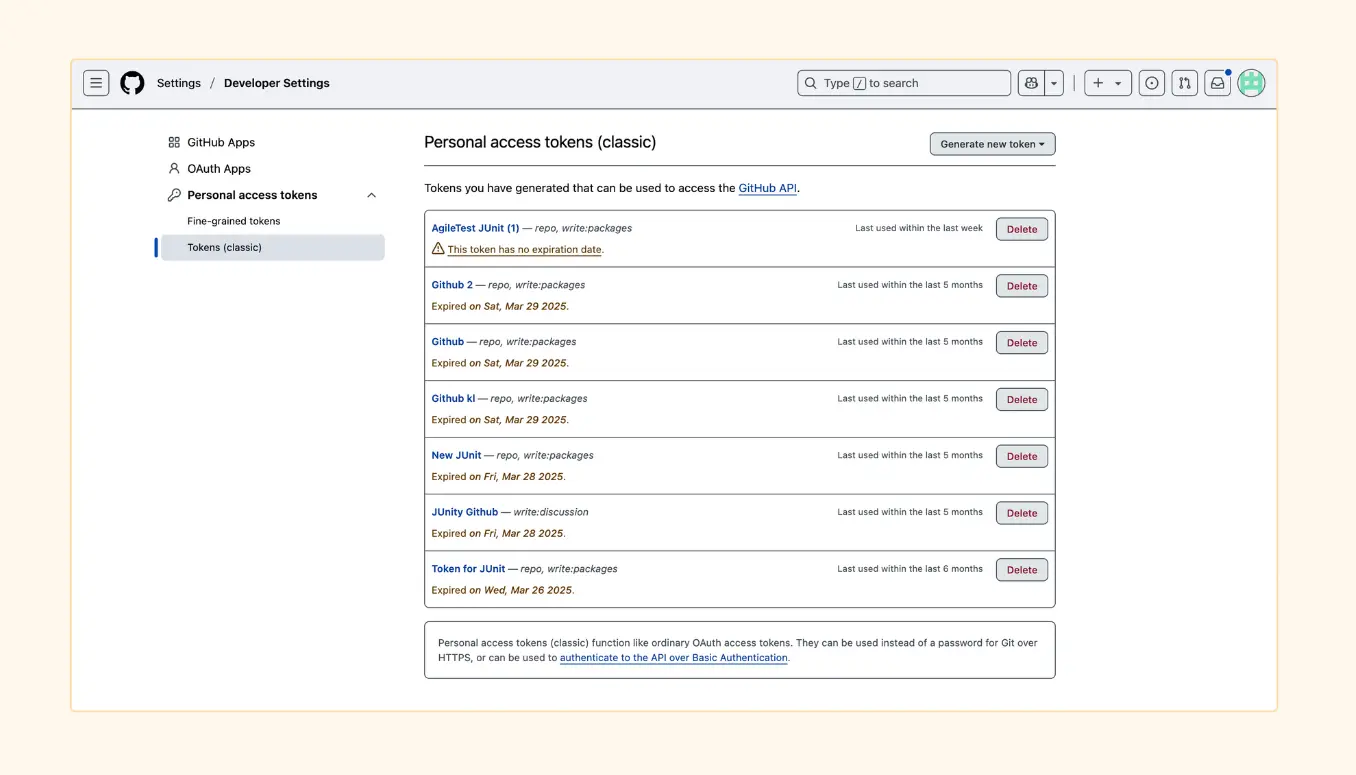
- In GitHub, navigate to: Settings → Developer settings → Personal access tokens → Tokens (classic).
- Click “Generate new token.”
- Provide a name such as “AgileTest Integration” and set an expiration date if desired.
- Enable the following permission:
- write:packages
- write:packages
- Click “Generate token” and copy it to a secure location.
You will store this token as a secret in your GitHub repository later.
Step 3: Define Your GitHub Actions Workflow (with sample.yml)
Now it’s time to create the automation workflow that will:
- Authenticate with AgileTest
- Execute your automated tests
- Upload the test results directly to AgileTest
Setup:
- In your GitHub repository, create the following folder structure (if it is not already present):
.github/workflows/ - Create a new YAML file inside the folder, for example:
sample.yml - Inside sample.yml, paste the following sample logic:
bash
# Authenticate with AgileTest and get a JWT token
export token=$(curl -X POST “$AGILETEST_AUTH_BASE_URL/api/apikeys/authenticate” \
-H ‘Content-Type: application/json’ \
–data ‘{“clientId”:”‘”$CLIENT_ID”‘”,”clientSecret”:”‘”$CLIENT_SECRET”‘”}’ | tr -d ‘”‘)
echo “Token generated: $token”
# Upload JUnit test results
curl -X POST \
-H “Content-Type: application/xml” \
-H “Authorization: JWT $token” \
–data @”./playwright-report/results.xml” \
“$AGILETEST_BASE_URL/ds/test-executions/junit?projectKey=${{ inputs.PROJECT_KEY }}&testExecutionKey=${{ inputs.TEST_EXECUTION_KEY }}&milestoneId=${{ inputs.milestoneId }}&testEnvironments=${{ inputs.testEnvironments }}&testPlanKeys=${{ inputs.testPlanKeys }}&revision=${{ inputs.revision }}&fixVersions=${{ inputs.fixVersions }}”
Next, you need to store the required credentials as secrets in your GitHub repository.
Steps:
- Go to your GitHub repository → Settings → Secrets and Variables → Actions.
- Add the following secrets:
- CLIENT_ID
- CLIENT_SECRET
- AGILETEST_BASE_URL
- Any project-specific values
- CLIENT_ID
This ensures that your secrets are securely stored and available to the GitHub Actions workflow.
Step 4: Connect AgileTest to Your GitHub Repository
Now that your workflow is ready, connect AgileTest to your GitHub repository.
In AgileTest:
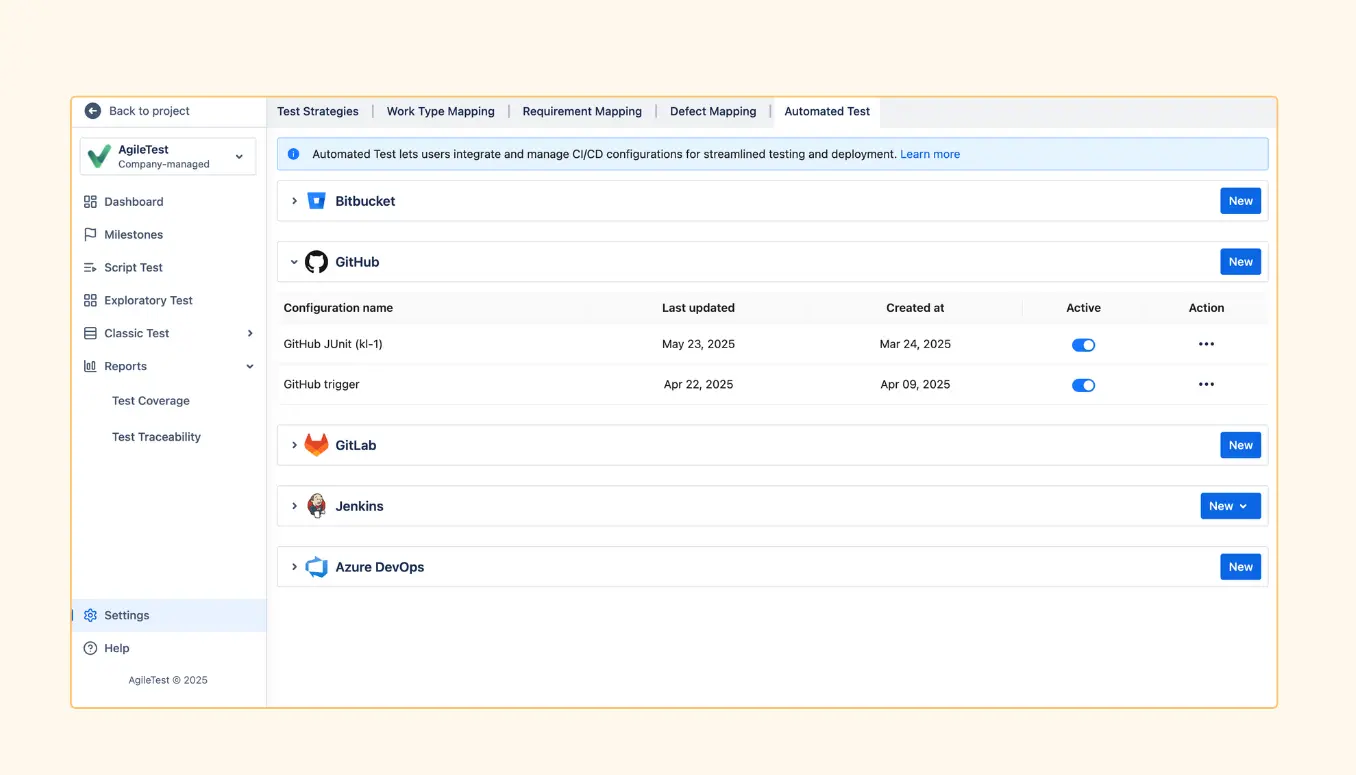
- Go to: AgileTest → Settings → Automated Test → GitHub.
- Click “New Configuration”.
- Fill in the following details:
- Repository Name (e.g., your-org/your-repo)
- Workflow File Name (e.g., sample.yml)
- GitHub Token (your PAT from Step 2)
- Repository Name (e.g., your-org/your-repo)
- Click Save, then toggle Active to enable the configuration.
This lets AgileTest trigger your pipeline directly from the test execution issue screen.
Step 5: Trigger the Test Pipeline from AgileTest
Once everything is set up, you are ready to run your tests and upload the results.
Here’s how:
- Navigate to a Test Execution ticket in Jira (within the AgileTest project).
- In the AgileTest panel, select the appropriate GitHub configuration.
- Click “Trigger Pipeline.”
- Go to the GitHub Actions tab to monitor the pipeline progress.
- Once the pipeline completes, the test results will be uploaded and appear directly in AgileTest.
- You can track the status of each test case — whether it passed, failed, or was skipped — all within Jira!
This integration not only saves time but also provides full visibility into the quality of your software, helping teams quickly identify and resolve issues. As you continue to refine your CI/CD pipeline, this setup will play a key role in enhancing your development lifecycle and supporting better, faster releases.
Why This Integration Matters
This integration is a game-changer for both QA engineers and developers by enabling seamless automation and improving overall workflow efficiency. Here’s how it benefits your team:
- Eliminate repetitive manual test uploads: Automating the test result uploads saves valuable time and reduces the chances of human error.
- Ensure test execution results are always up-to-date: By directly linking AgileTest with GitHub Actions, test results are continuously synchronized and always reflect the latest code changes, keeping your testing process relevant and timely.
- Improve traceability and test coverage inside Jira: With the ability to track test cases, coverage, and status directly in Jira, you gain better visibility and insight into the quality of your software, making it easier to track progress and identify issues early on.
- Create a truly automated and collaborative QA workflow: This integration promotes a more collaborative development process by allowing teams to work with fewer manual steps and providing instant feedback.
This integration not only makes testing faster and more efficient but also strengthens collaboration across the development and QA teams, making the whole process smoother and more reliable.
Learn More About CI/CD with AgileTest
To dive deeper into the details or troubleshoot any step, refer to our official documentation here:
👉 Trigger Build Remotely with AgileTest – GitHub
Final Thoughts on Test Automation
Integrating AgileTest with GitHub Actions unlocks powerful CI/CD automation for any team using Jira for test management. This setup not only simplifies the testing process but also fosters faster, more reliable software delivery.
Give it a try today and take your test automation to the next level—experience faster releases, better collaboration, and more smoother workflows. You will be amazed at how much more efficient and effective your process becomes!